No one likes to be stressed, but it's a big part of life and we all have to deal with it. Work, health, relationships, politics, community, neighbors, friends and family - they can all throw curve balls that cause stress, which then roll on to affect all other areas of our life. Learning to deal with stress is important for both mental and physical health, so we wanted to take a break from talking about printing products and focus on something that we can all benefit from right now.
STRESS BUSTER #1: Prioritize
Avoid letting everything you need to do swirl around like a big bunch of stress-balls in your brain. Prioritize. Do the things first that have the most impact and spend less time on less urgent matters. Here's a tip you don't often hear when people talk about prioritizing: When you're making your lists, zero in on the things that are really out of control and remove them from the list totally. Feels so good!
STRESS BUSTER #2: Set realistic deadlines
Try not to set unrealistic deadlines for yourself. Writing a book? Instead of saying you'll have it done in a month, instead say you'll write for 1 hour per day. If someone else is giving you harsh deadlines, see if you can negotiate.
STRESS BUSTER #3: Know Your Peak Performance Times
Are you a morning person? A night owl? We all have certain times in the day when we're more productive. Try to adjust your hours to fit your peak performance times. For example, if you are best during early morning hours, head to your "office" at 5 a.m. for a few hours of creative writing before the kids get up, then schedule exercise, conference calls, social media and other breaks from work for later in the afternoon.
STRESS BUSTER #4 Get Outside / Get Active
Fresh air does wonders for your mind. A little bit of cardio will do even more. Take breaks from work by stepping out into your backyard to soak up some sun, or taking your dog or kids on a quick walk. Mother Nature gives us plenty of space to breathe and surroundings that are bound to make you feel at peace. Plus some of the benefits of exercise include boosting energy, creativity, focus and productivity.
STRESS BUSTER #5: Give yourself a break
When we say give yourself a break, we mean it literally. Take some time for you and do something that gives you joy or peace. Art, exercise, sipping a caramel cappuccino in the park, reading a lighthearted novel, crafting, cooking, whatever it takes. It's easy to get caught up in trying to go-go-go and do everything for everyone else. Stop, breath, and take a moment for yourself. It'll do wonders.
We've got something fun to debut here for you today - a new type of easel-style standing desktop calendar we know you'll love! If you're looking for a product that will stand up and get attention (see what we did there?!) this is what you need.
While we're calling this a calendar, please don't let that limit what you can do with this for content. These are also often used to share daily affirmations, inspirational quotes, reminders, tasks, and even to support programs for everything from finance to food to fitness.
To create this special product, we start with the easel part (or A-frame), using sturdy hardcover chipboard covered in paper that can be printed on. The first page of your calendar can also be hardcover, but you also have the choice of using paperback cover stock or even a vinyl poly plastic printed cover. Then it's all put together with metal wire-o or spiral binding.
Here's another great thing about these calendars - they can be printed any size! So if you want something tall and thin, or short and wide, or anything in between, we can create one that fits your needs. The minimum order quantity is just 25.
Our CEO, Cindy, put together a video showing all the details for this product and it's posted on our Video Vault page on the website. Or you can click here to watch it instantly. The sample shown in the video contains 180 sheets of paper to create a 360-day calendar. If you'd like to order the sample calendar we show here, filled with undated daily inspirational quotes, you can go to our samples page and order one directly from there.
We hope this new product has given you something to think about today. It would make a great standalone product, sure, but also perfect for adding to subscription boxes, mentor programs, in swag bags for events, or as gifts and marketing samples.
Sometimes when you’re writing, the ideas and words flow. Other times, not so much. We know how frustrating that can be, so we gathered up some of the best strategies for writing others have shared for getting your ideas out of your head and into your product.
TIP #1: Write first, edit later
We read this in a blog from productivity expert Laura Vanderkam titled Write Fast, Edit Slow and loved it! “When you write fast, you just get it down. You let the momentum of seeing words add up push you forward," she said. "Turn off the inner critic because you’re not trying to create a perfect manuscript, if such a thing is even possible (it isn’t). ... Done is better than perfect because there is no perfect without being done. I truly believe it is easier to turn something into something better than to turn nothing into something”.
TIP #2: Know what works best for you
Everyone creates differently. If you're someone who thrives on routine, make writing a habit. If you like to wait until you're "in the zone,", then you might want to try batching. Here are tips for both writing styles:
MAKE WRITING A HABIT: What works for many people is setting aside regular time for writing and making it a habit. Set aside specific time blocks for writing. If you feel overwhelmed, start small. Write for 30 minutes a day at the time you feel most productive or creative. You'll be amazed what you've accomplished after just a few weeks of doing this.
LEARN HOW TO BATCH: We loved this tidbit writing expert Melissa Cassera shares about getting in the mood to write. She said: "Some people love writing “a little bit every day.” I do not. I like to schedule a handful of big writing days per month (called “batch days.”) When the next scheduled day rolls around, I write a ton of material in one, long, mostly-uninterrupted burst. It’s like baking a whole bunch of word-cookies all at once."
TIP #3: Get rid of interruptions
If you find your writing going nowhere due to distractions from family, friends or surroundings, take control! Silence your phone, turn off your email, send the kids to grandma's or a playdate for a few hours. If working from home is too distracting, head to your favorite coffee shop and sip on a delicious drink while letting the words flow.
TIP #4: Take a break
You can't type on that keyboard forever, and your brain deserves to rest and recharge once in awhile. So be sure to take regular breaks, this will give your mind a chance to hit the refresh button and loosen up all those brilliant thoughts that can get stuck in the bottleneck of intense focus.
 No one likes to be stressed, but it's a big part of life and we all have to deal with it. Work, health, relationships, politics, community, neighbors, friends and family - they can all throw curve balls that cause stress, which then roll on to affect all other areas of our life. Learning to deal with stress is important for both mental and physical health, so we wanted to take a break from talking about printing products and focus on something that we can all benefit from right now.
 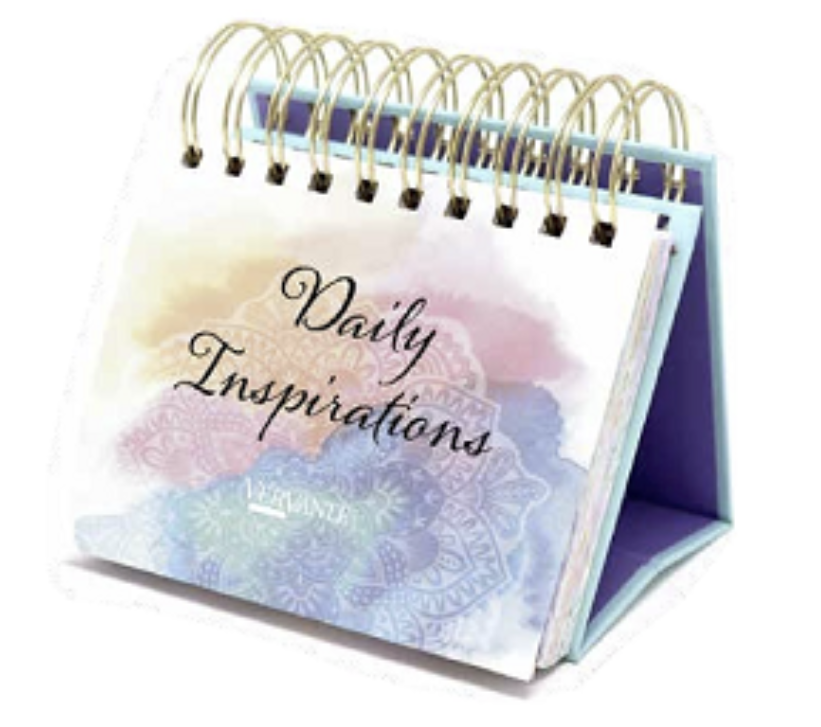 We've got something fun to debut here for you today - a new type of easel-style standing desktop calendar we know you'll love! If you're looking for a product that will stand up and get attention (see what we did there?!) this is what you need.