Free Guide: The Ultimate Checklist for Creating Print-Ready Files
If you're ready to send in your print files, but not sure exactly how they need to be formatted - this expert guide is for you. Print file preparation is extremely important, so even if you're not ready to start printing just yet, you'll want to download and save this guide to help you when you're ready.
This free guide provides checklists for preparing print files for:
Perfect bound books
Card decks
Spiral-bound softcover
Hard-cover spiral / Wire-o bound
Kiss-cut stickers
Saddle-stitch softcover
Turned-edge binders
Board covers, Laminated covers & Poly paper covers
Hard cover casebound books
We also have a full article on the blog discussing the importance of proper print-file preparation and details that will help here: How to prepare your files for printing. This free guide - and many others like it - can be viewed and downloaded from our Expert Guides page on the Vervante website. We're here for questions, free quotes, and any self-publishing assistance you might need at [email protected].
We're very excited to share with you today a new expert guides now available on our website Expert Guides page. It's free, easy to download and print, and we can't wait for you to see it.
New Free Guide:
Amazon Images & "Peek Inside" Feature
This expert guide shares how to provide images for your listing, and how to add a popular feature that shoppers love. We can use single images of a book cover, or we can use designed images (like the one here with multiple products).
We can also help you set up something similar to Amazon's popular "Look Inside" feature so customers can get a taste of the book or product you're offering for sale. We offer this service for both Amazon and Vervante Bookstore listings, called "Peek Inside."
You're invited to check out our new guide, recently posted to the Expert Guides page on our website, for details. If you'd like to set this up for your listings in Amazon or the Vervante Bookstore, just following the easy direction in the user guide. And we'll be here at [email protected] if you need any help.
You can view and download this guide, and many others, on our Expert Guides page on the website.
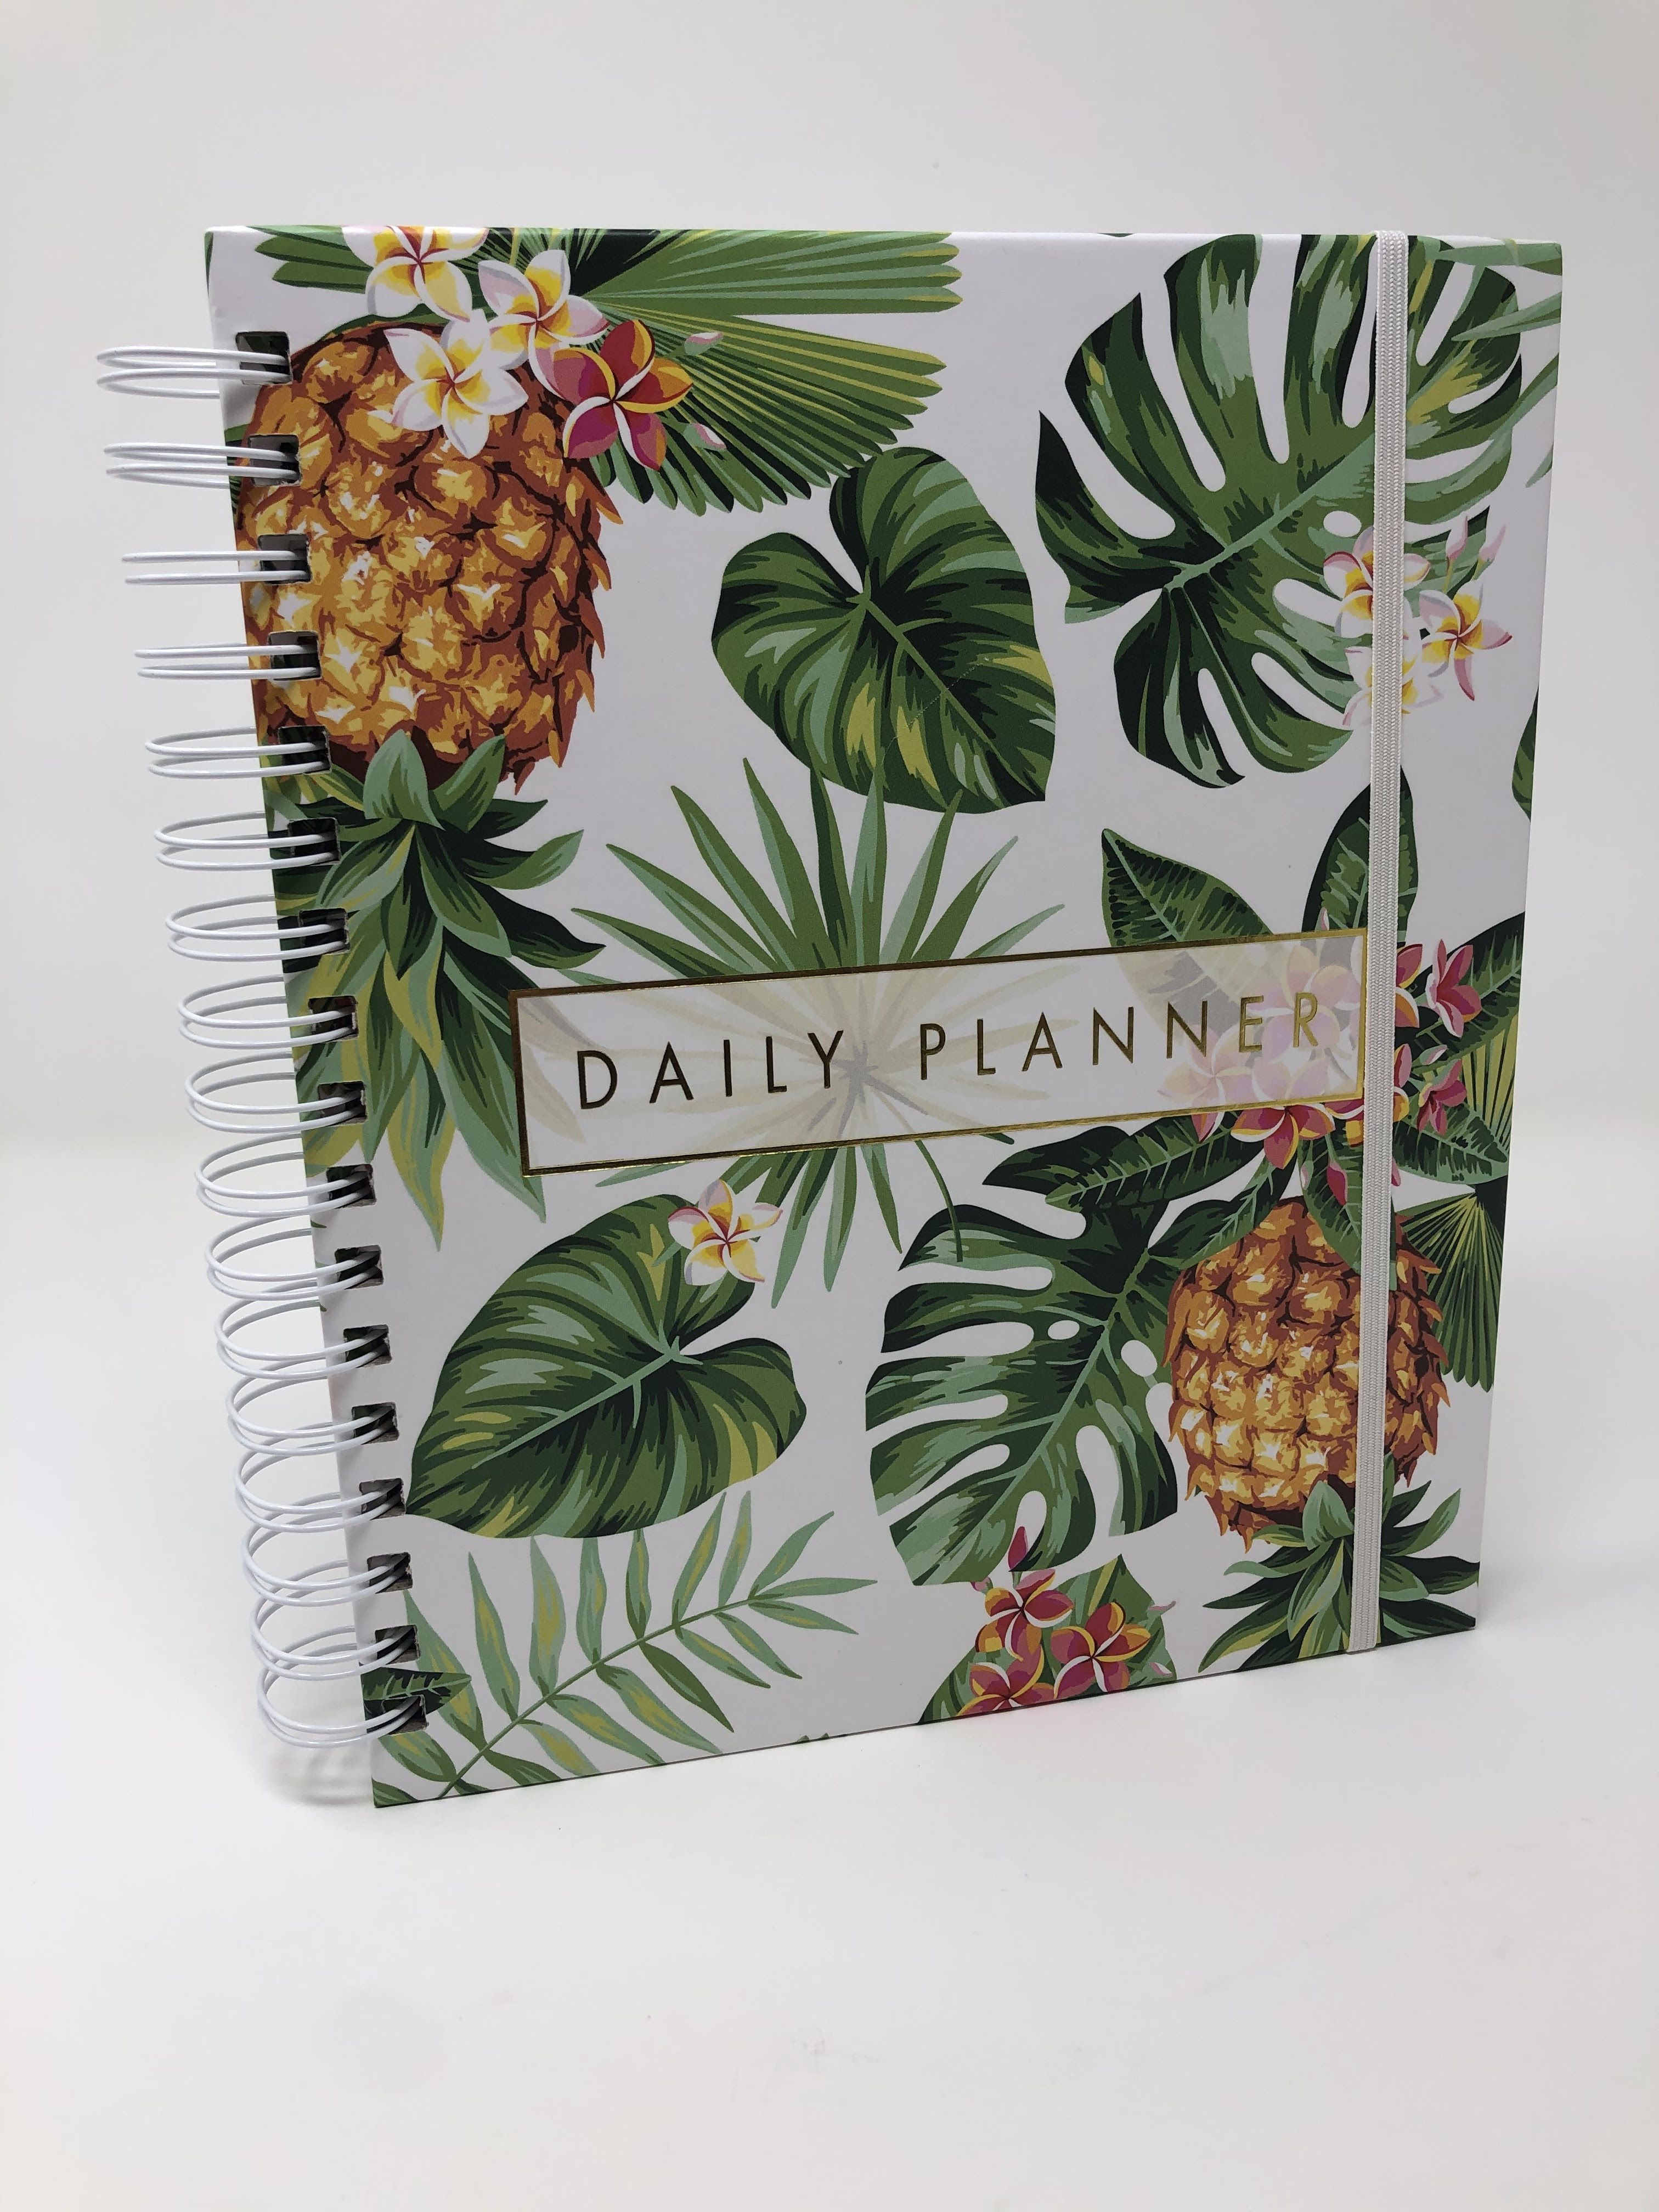
Spiral binding is popular for many types of books because it makes them so much easier to use. Planners, journals, workbooks, cookbooks, and coloring books are often so much easier to read and write in with spiral binding as it allows them to open fully and lay flat. Picture a coloring book or planner that is perfect bound, like a novel, next to one with spiral binding that lays flat, and you’ll see why spiral binding is often the better choice.
Did you know, however, that spiral binding on-demand is rare in the publishing world? That’s why we’re happy to share with you that we offer on demand spiral binding and the ability to sell your spiral-bound product on Amazon and anywhere else you want too.
Spiral binding options
Spiral binding is sometimes also called spiral coil, plastic coil or coil binding. Spiral binding is durable, won't break or bend under pressure, and comes in more than 50 different colors allowing you to customize your book by matching the binding to the cover for a unique and attractive finish.
Spiral is also available in metal. This is a very popular option over metal wire-o binding. The reason is because it is a continuous metal spiral so the binding cannot come apart. Sometimes with wire-o binding, the loops can be pulled apart or they inadvertently don’t get clamped together properly. We love metal spiral binding because this doesn’t happen.
Metal spiral is available in three colors: silver, black and white. We stock silver metal spiral. Black and white can be special ordered.
Plastic spiral is available in more than 50 colors. We stock black and white. Other colors can be special ordered.
Both Metal and Plastic spiral binding are available on-demand or for bulk orders.
Wire-o binding
A similar binding option for books is wire-o binding, also known as twin loop, double-loop, or wire binding. It also allows a book to lay flat, comes in a variety of colors, and is a popular choice for journals and planners.
The minimum order quantity for wire-o binding is 25.
Click on these links to see the color options for plastic spiral, metal spiral, and metal wire-o binding:
Using spiral or wire-o binding with custom covers
We offer both soft and hard cover options with spiral and wire-o binding. Spiral and wire-o binding can be used with all of our cover options:
Soft covers
Poly paper covers
2-ply board covers
Hard covers
If you want the best of both worlds – a spiral bound book that lays flat, but has a spine like a traditional book that looks good on a shelf – we offer a unique wrap-around cover that provides everything you want.
Spiral binding videos
Be sure to watch the videos in our website Video Vault to see multiple highlights of products with spiral binding, wire-o binding, and all of the customizations we mentioned here.
We offer samples for spiral bound products to help you see and feel how it might function with your own products. You can see our sample offerings page here. We are also happy to provide free quotes for spiral-bound products, or answer questions at [email protected].
 Free Guide: The Ultimate Checklist for Creating Print-Ready Files
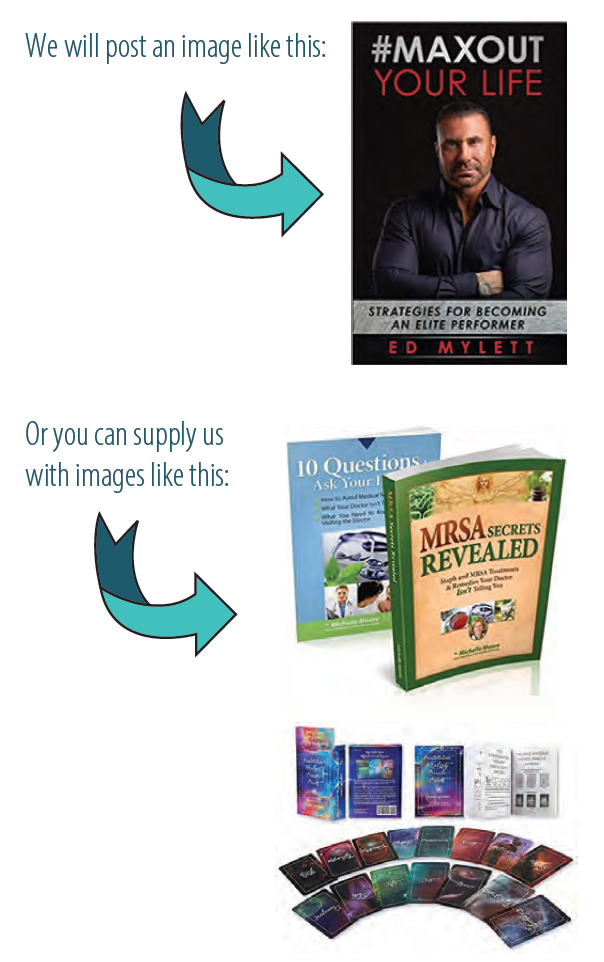
 Spiral binding is popular for many types of books because it makes them so much easier to use. Planners, journals, workbooks, cookbooks, and coloring books are often so much easier to read and write in with spiral binding as it allows them to open fully and lay flat. Picture a coloring book or planner that is perfect bound, like a novel, next to one with spiral binding that lays flat, and you’ll see why spiral binding is often the better choice.
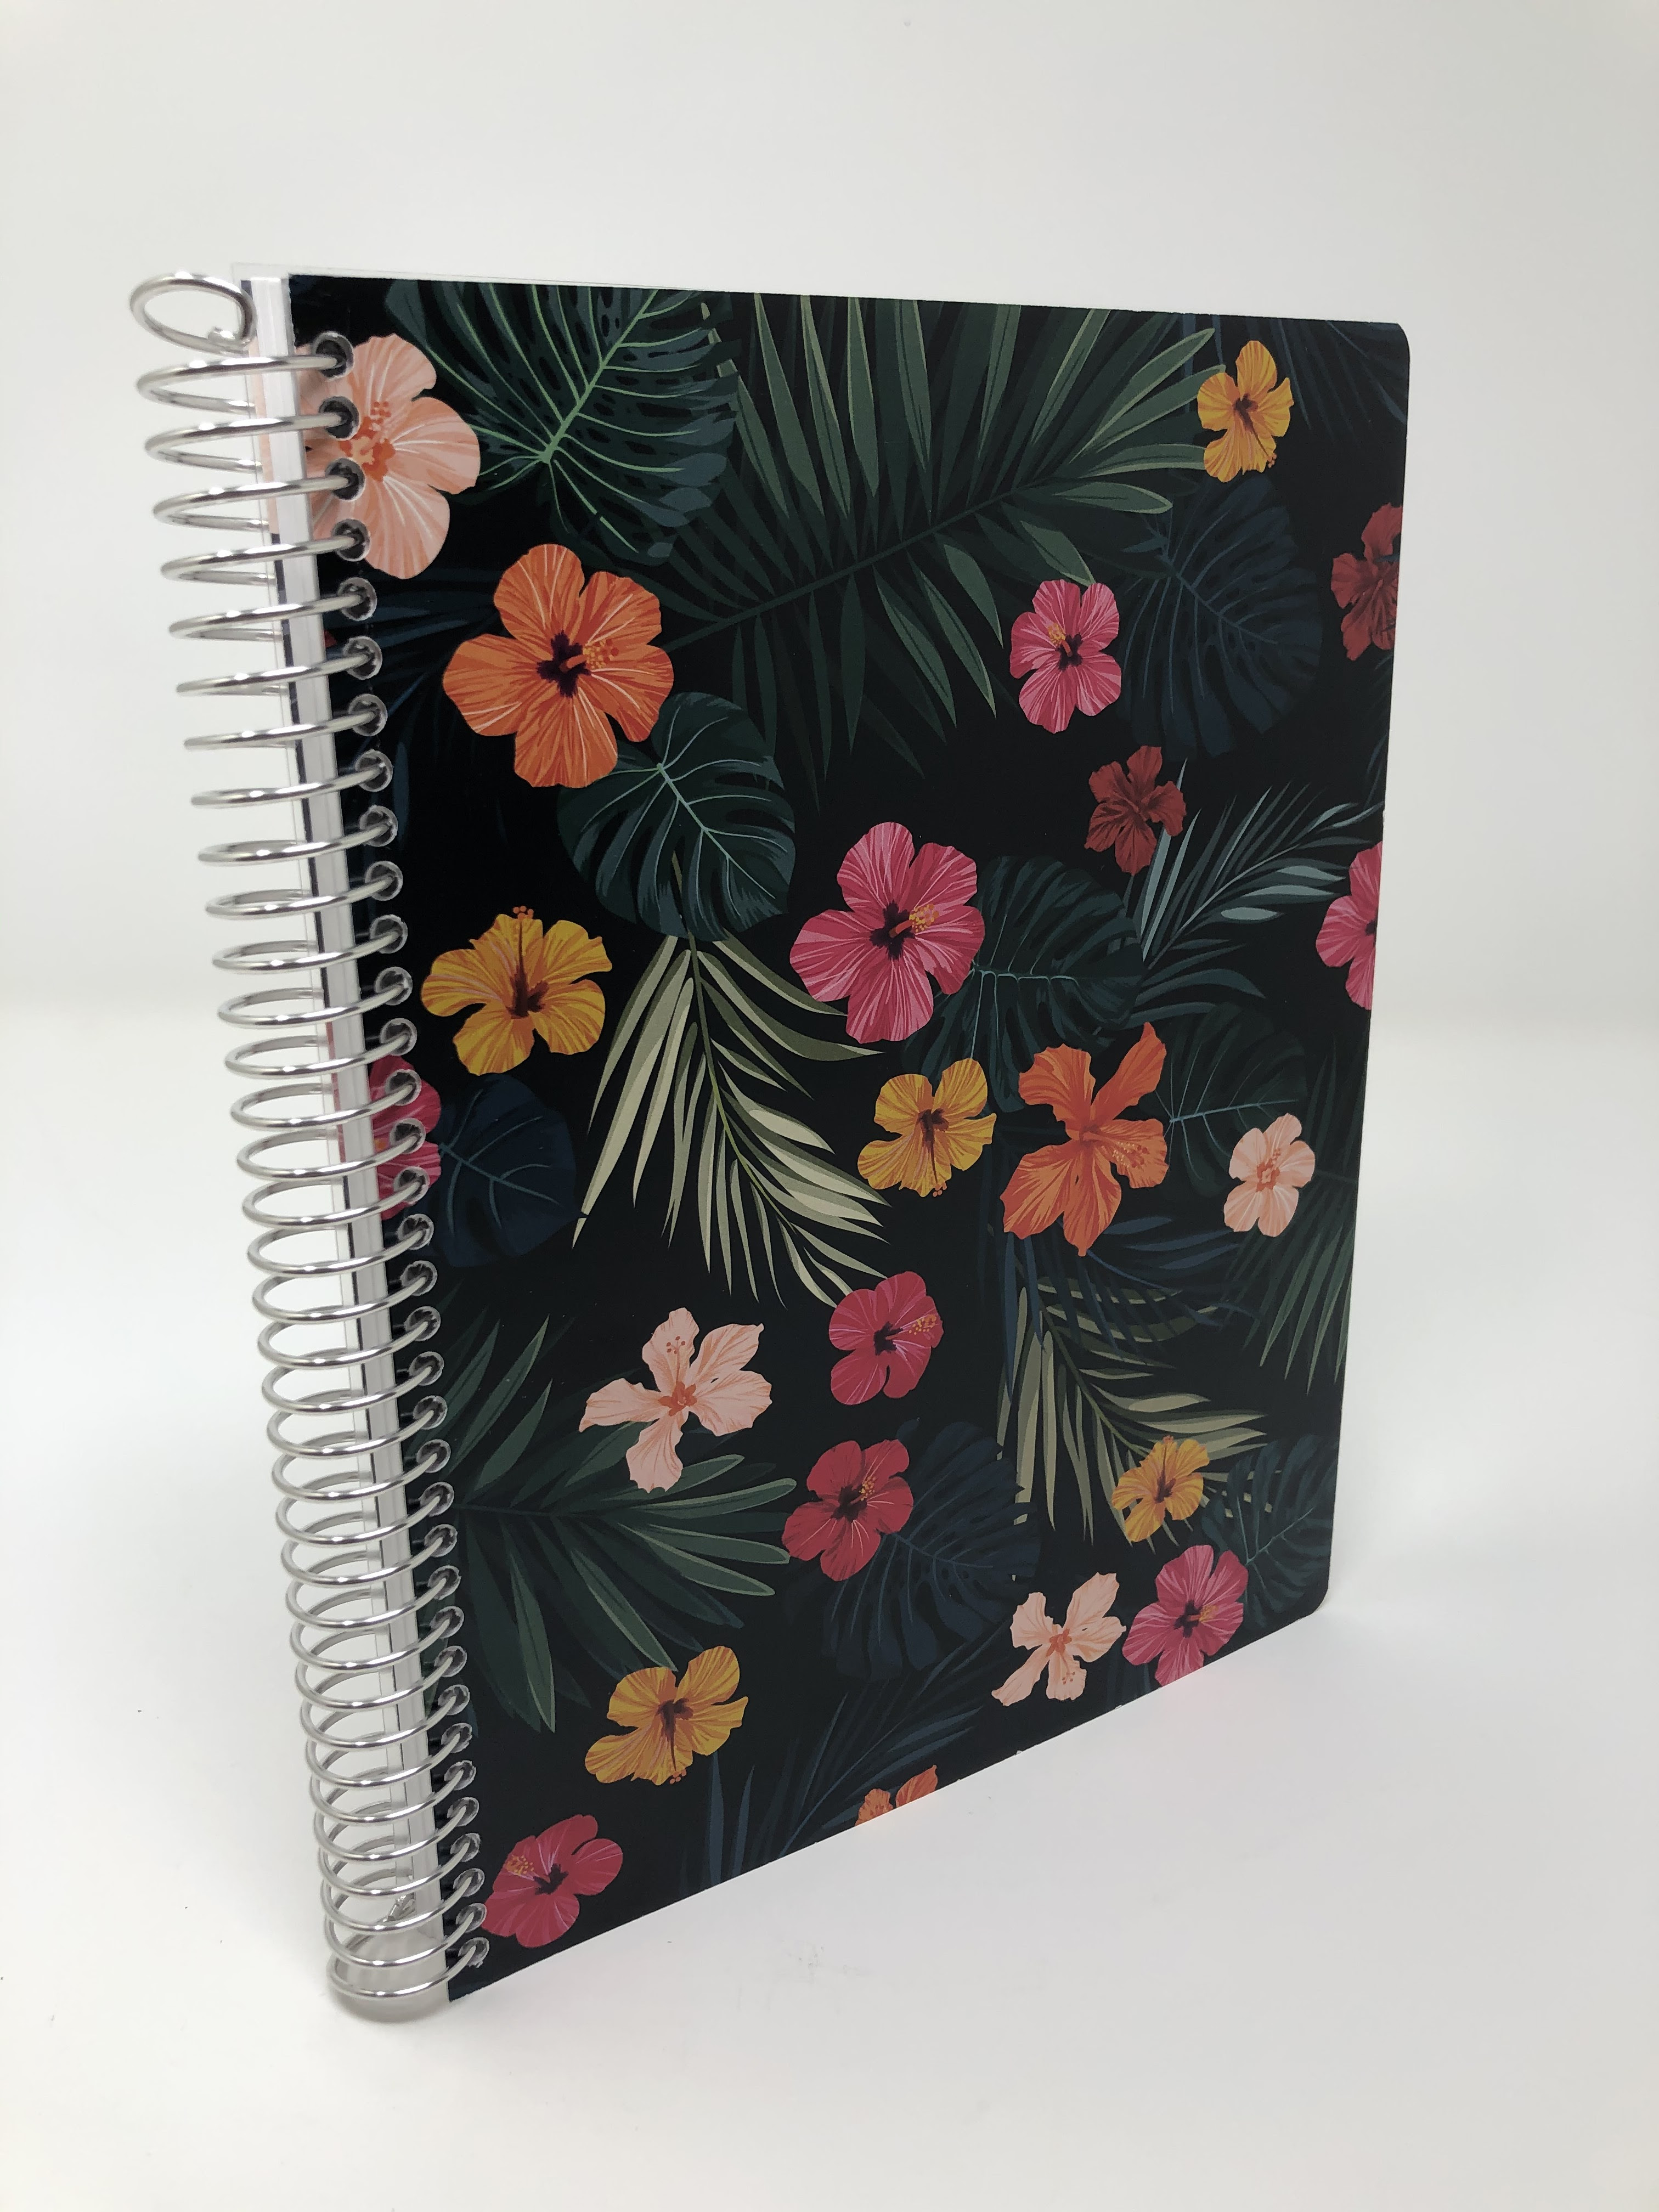